Welcome to I Need Leads' Onboarding Page
This onboarding page serves as your guide for everything you need to get started with any of our tailored marketing solutions.

Table of Contents
Welcome to
I Need Leads' Onboarding Page
This onboarding page serves as your guide for everything you need to get started with any of our tailored marketing solutions.
Table of Contents
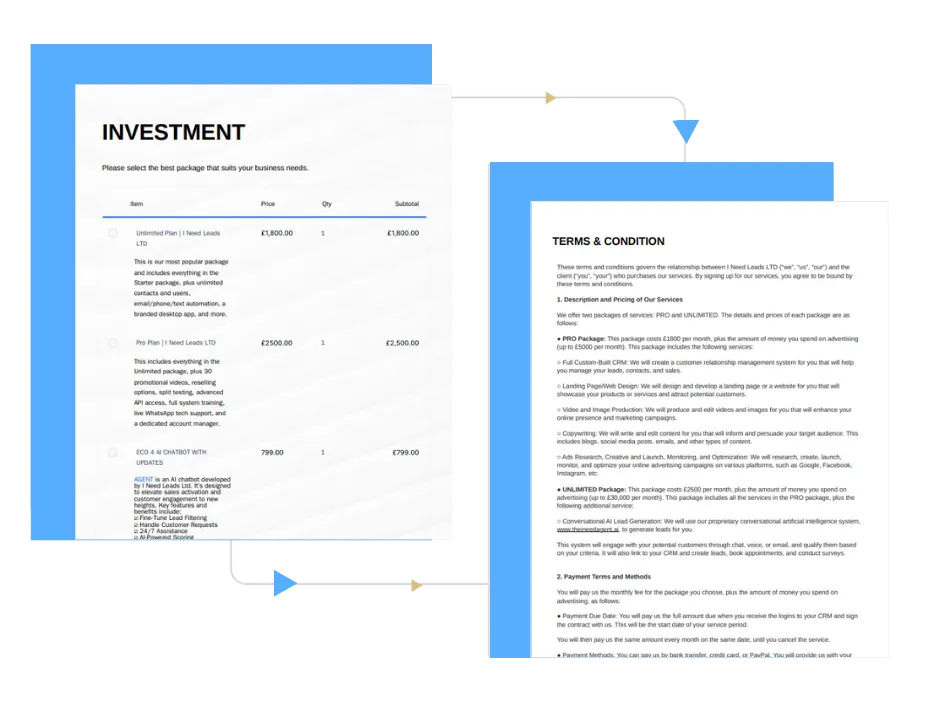
This guide will show you step-by-step how to get started with our lead generation services. After you've seen the power of our system in action through the demo, we'll send you a PROPOSAL outlining our services and pricing, along with the terms and conditions.
STEP 1
REVIEW AND SIGN
THE PROPOSAL
After you've seen the power of our system in action through the demo, we'll send you a PROPOSAL outlining our services and pricing, along with the terms and conditions.
Once you've received the proposal, carefully review it and let us know if you have any questions. If you're happy with everything, sign it electronically to proceed.
STEP 1
REVIEW AND SIGN
THE PROPOSAL
Once you've received the proposal, carefully review it and let us know if you have any questions. If you're happy with everything, sign it electronically to proceed.
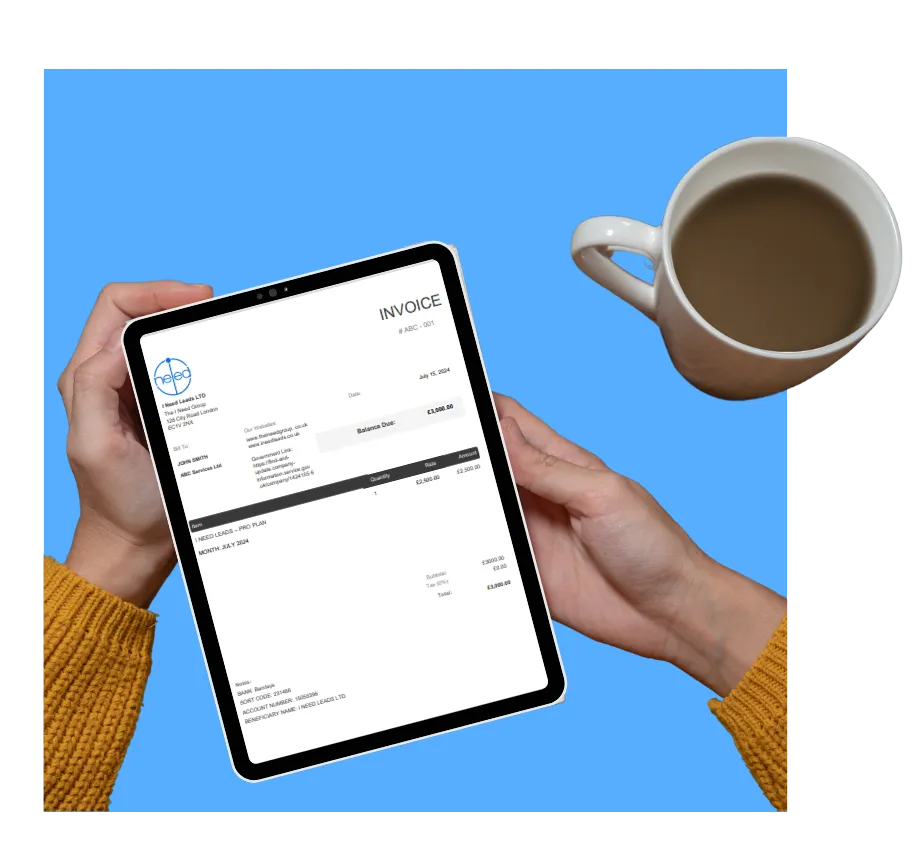
Step 2
REVIEW YOUR INVOICE AND PROCESS PAYMENT
Upon signing your proposal, an invoice will be automatically generated for your records along with the payment link. Make a secure payment using the options provided.

STEP 3
INFORMATION GATHERING
In the onboarding email along with your login information, you'll get a link to the Onboarding form where we request for the information below. You can also fill in the form here.
Client's name
Email,
Pone number
Business name
Business Address
Website
Niche
Social Media Profiles (links to all their social media platform)
Branding Assets:
- Company logo (high-resolution)
- Brand colours, fonts
Access: Login credentials for existing website, social accounts, Google Ads, if applicable.
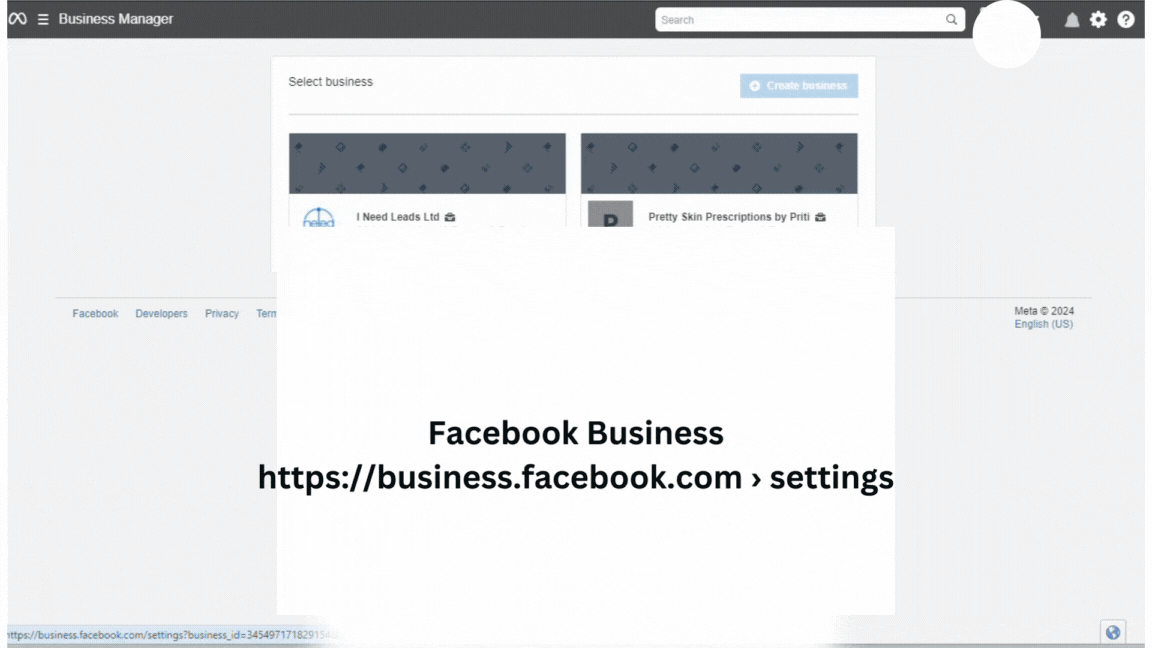
AD ACCOUNTS
Facebook for Business
(QUICK GUIDE)
Steps to Set Up a Facebook Business Manager with Meta Business Suite:
1. Create a Facebook Business Account
2. Choose a default view
3. Connect other business accounts
4. Grant access to users
5. Download the mobile app
To access: Go to business.facebook.com in a desktop browser. You will also use this address to log into Meta Business Suite or Business Manager. If you already have access to Meta Business Suite and Business Manager, you can also click the dropdown menu located at the top of the left navigation bar.
Grant Facebook Ad Account Permission:
1. Select the Ad Account.
2. Click Assign Partners.
3. Assign Partner by: Business ID.
4. Enter their Business ID.
OUR FACEBOOK BUSINESS ID: 345497171829154
5. Select the access of “Manage campaigns” (or 6.“Manage Ad Account” if you want to give them Admin access)
CLICK HERE for the full guide:
https://www.facebook.com/business/learn/how-to-setup-business-manager
Google Ads
(QUICK GUIDE)
For detailed instructions on how to give our Manager Account access to your Google Ads account, please follow these steps:
1. Sign in to your individual Google Ads account.
In the upper right corner, click the Admin icon.
2. Click Access and security.
3. Select the Managers tab.
4. Look for a pending link request from the Agent Ai Chat Bots Manager Account.
5. Connect to: Agent Ai Chat Bots
Manager Account ID
In the "Actions" column, click Accept.
6. Once you accept, our team will have the necessary access to assist in managing your campaigns and integrating them with your AI Chat Bots.
Manager Account:
Agent Ai Chat Bots
216-469-3099
CLICK HERE for the full guide: https://support.google.com/google-ads/answer/6372672?hl=en
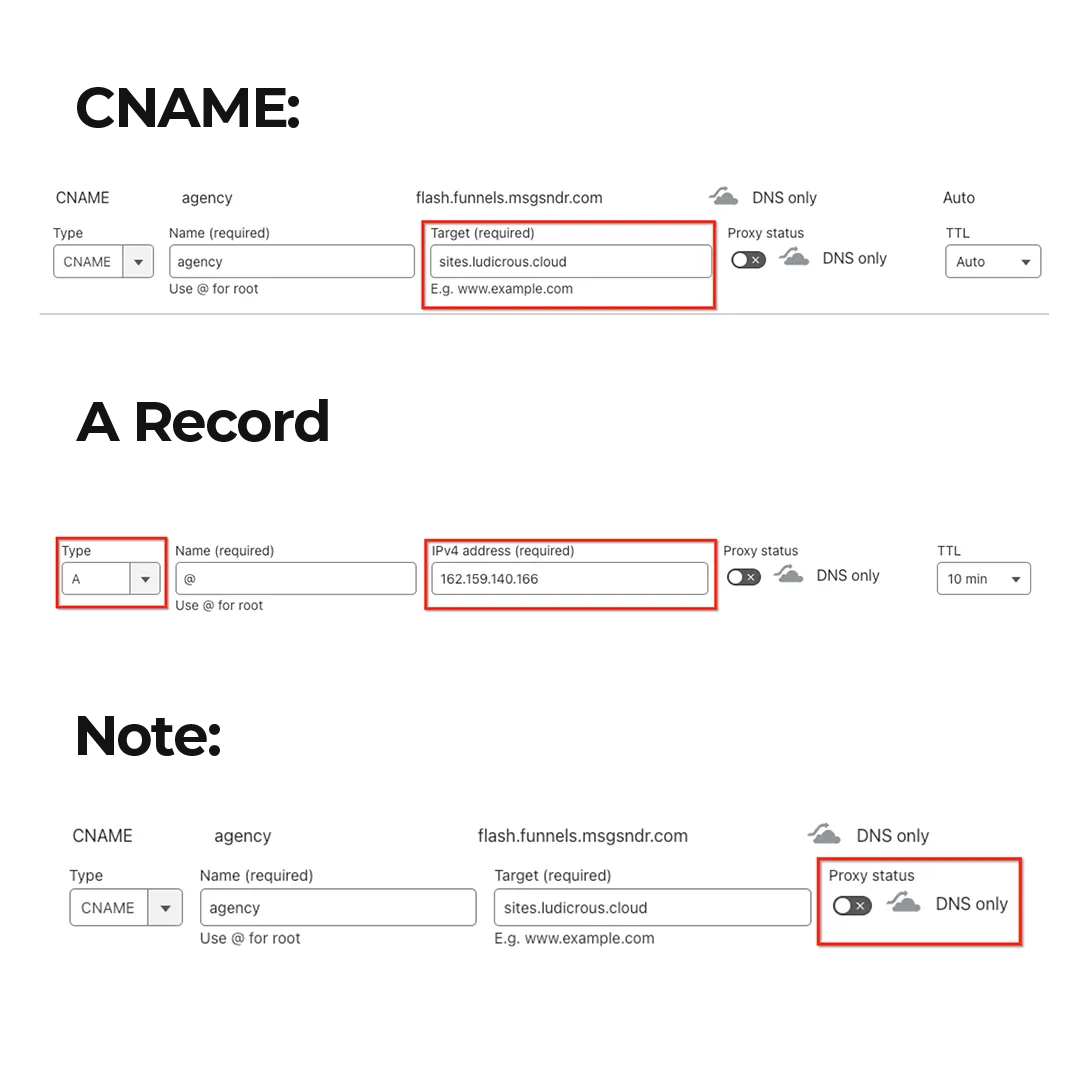
GUIDE TO CONFIGURING DOMAINS FOR YOUR FUNNELS OR WEBSITE
STEP 1
ADD AN A RECORD OR A CNAME RECORD
You must complete this step within your domain registrar, such as Cloudflare or GoDaddy.
STEP 2
ADD A DOMAIN / SUBDOMAIN
TO YOUR SUB-ACCOUNT
Go to Settings in the left navigation menu
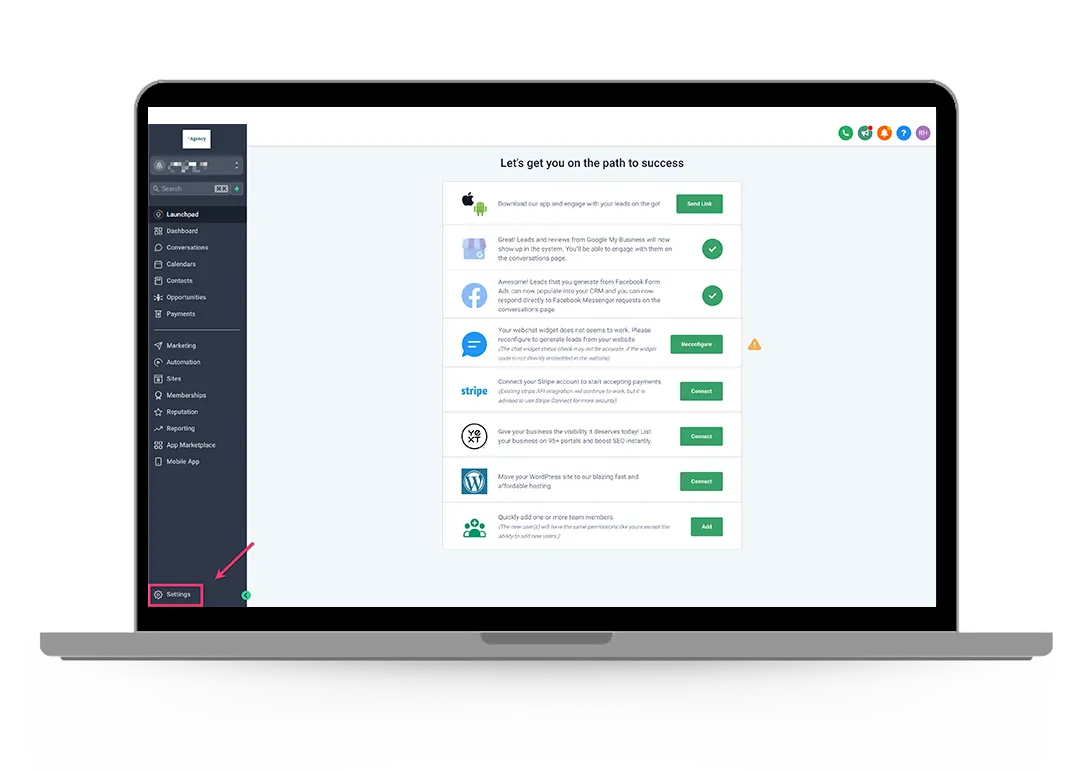

Next, go to Domains > click the + Add button
(or the + Add Domain)
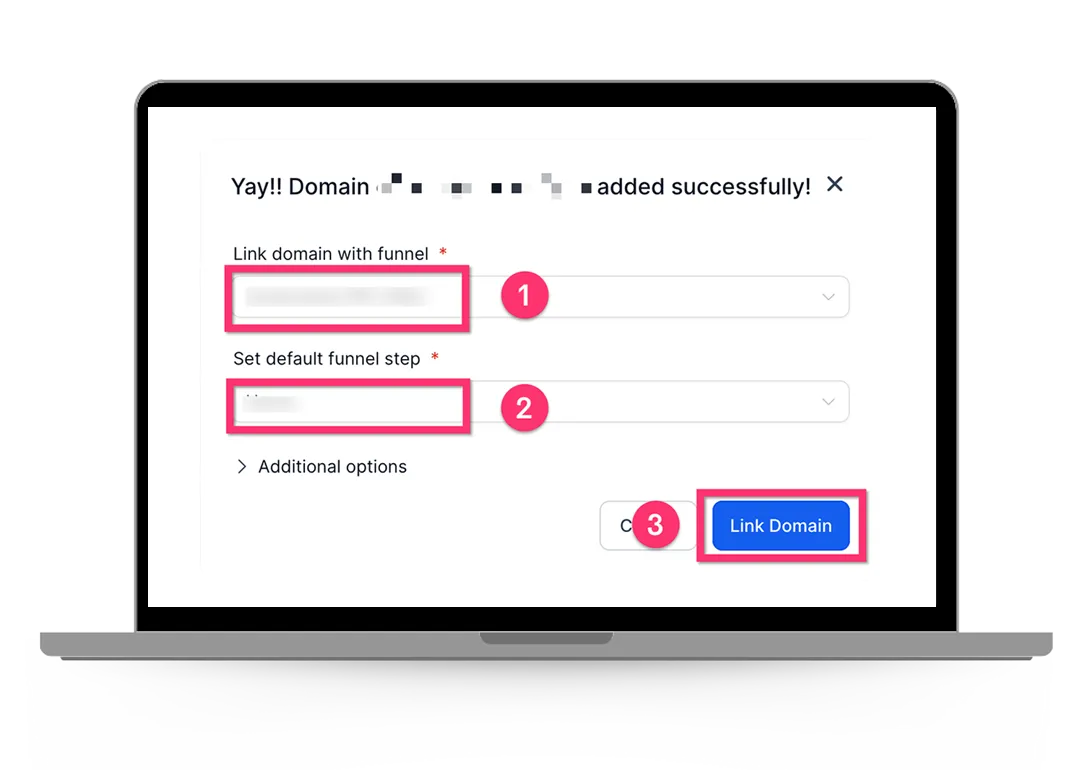
STEP 3
ASSOCIATE THE DOMAIN TO A FUNNEL / WEBSITE
Once the DNS records have been verified, you will be presented with a screen where you can choose which funnel or website you'd like to link.
Step 4
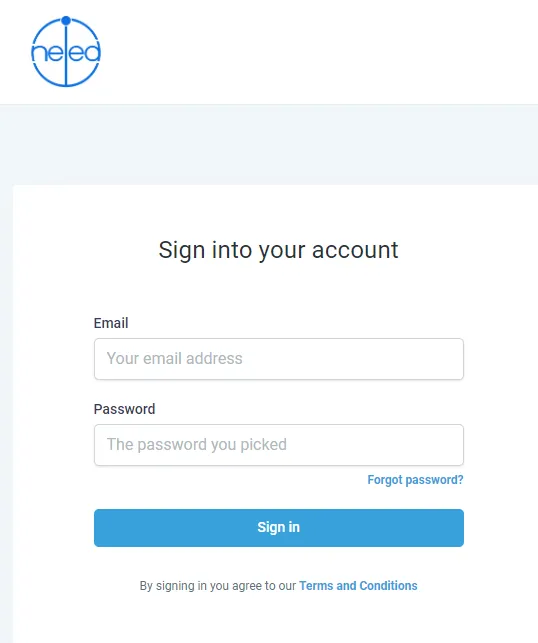
CRM LOG-IN AND DASHBOARD
Log-in credentials for your CRM are established during the initial account setup.
CRM Account Creation - Login with your email and designated password to access your CRM
Account Recovery Options: In case you forgot your password or simply want to change it, a "Forgot Password" feature is prominently placed on the login page. This option leads you through a secure process to reset their password, requiring only the email address associated with their account.
- LOG-IN link: https://login.theineedgroup.co.uk
Settings Customization
- Business profile with client information
- Connect domain and set up custom email addresses (if needed)
- Integrate preferred calendar (Google Calendar etc.)
- Link payment processors (e.g., Stripe, PayPal)
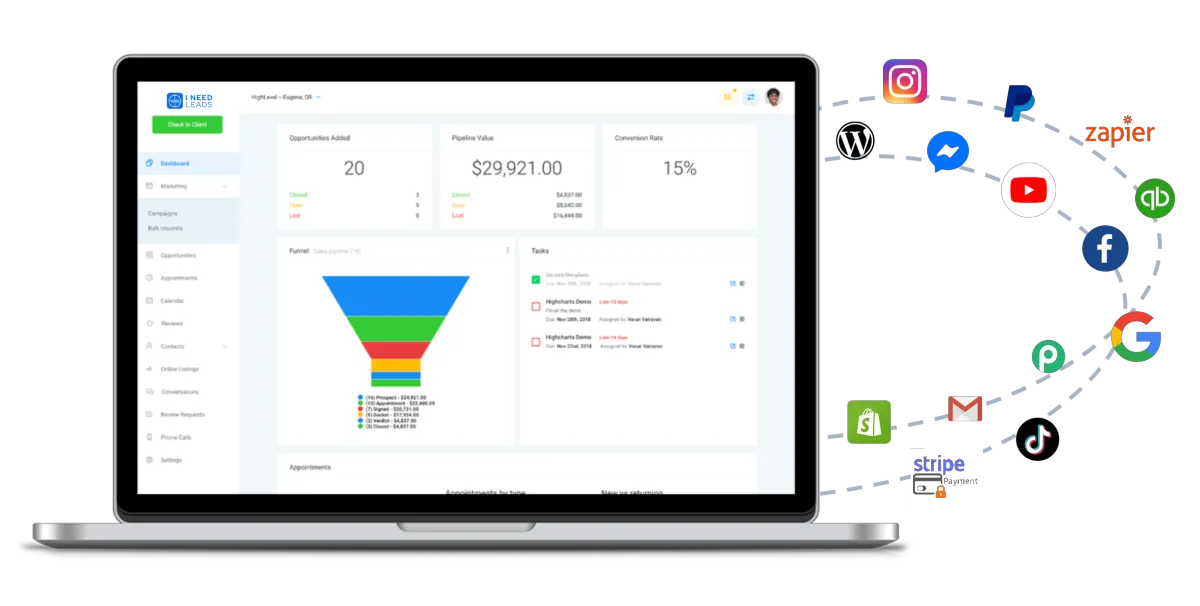
Getting Started with the I NEED LEADS CRM
1: LOG-IN PAGE: Upon reaching the login page, you will be prompted to enter your credentials, which include your email address and password as discussed in STEP 5.
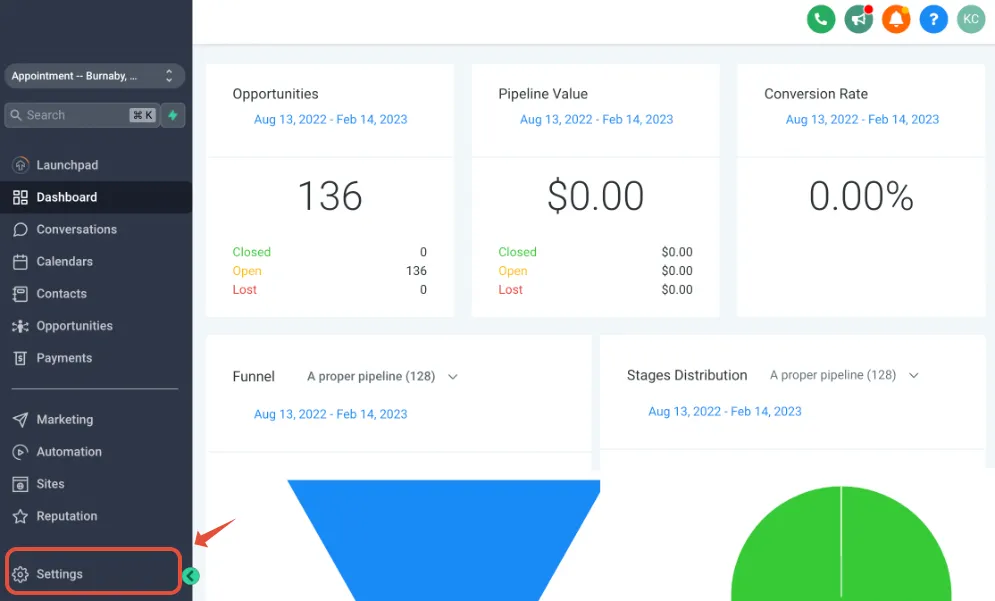
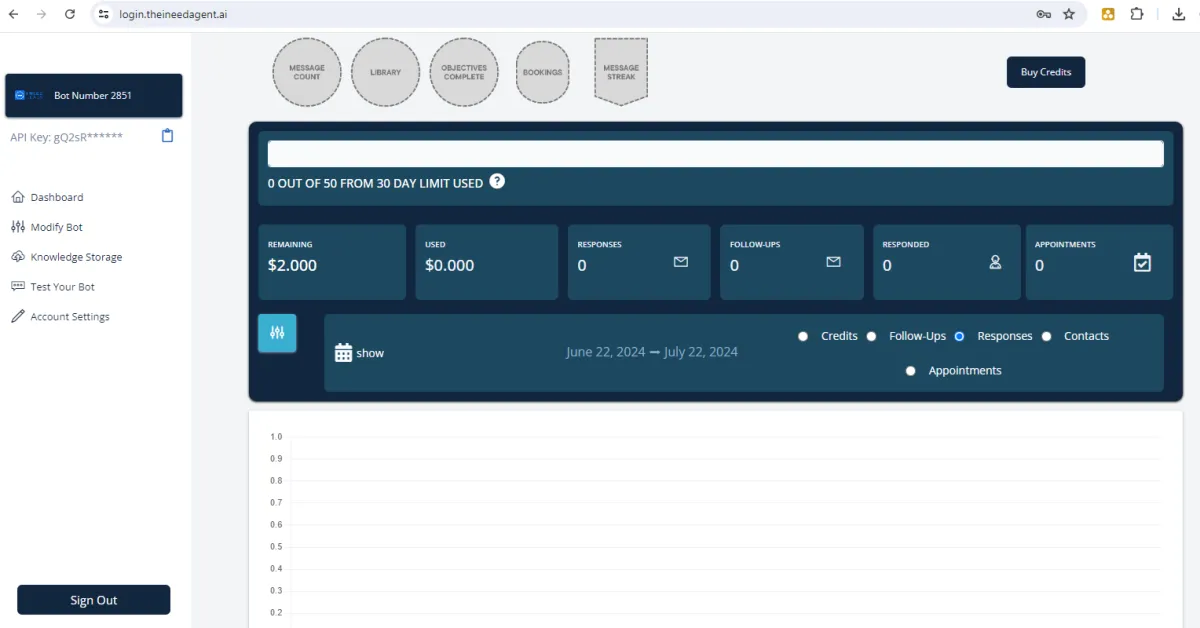
2: ACESS YOUR CRM DASHBOARD after log-in: After successful log-in, you will be directed to your CRM dashboard as shown below. This centralised hub shows an overview of the the CRM's features and functionalities.
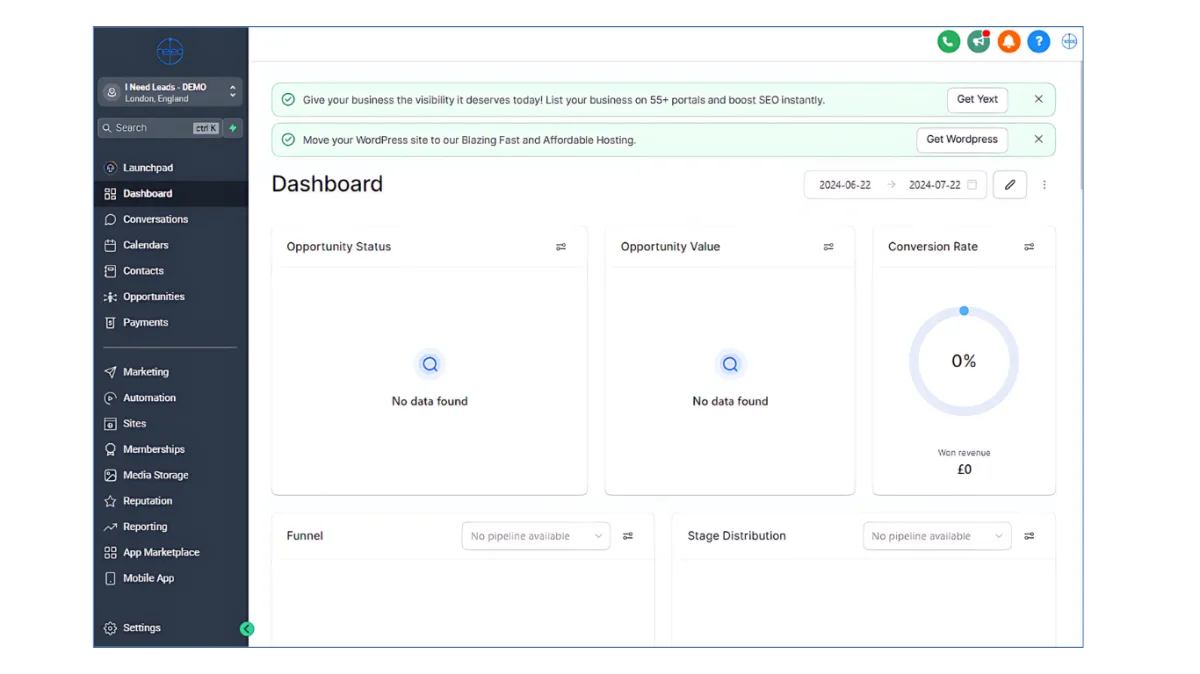
3. CUSTOMIZATION AND INTEGRATION: On the CRM are various customization options to tailor to your preferences. Integration with other tools and software further extends its capabilities, enabling a seamless workflow that accommodates a wide range of marketing, sales, and customer service activities. Standard customizations are discussed on the next step.
Step 5
CUSTOMIZATION: BUILDING CORE WORKFLOWS
Depending on your business objectives and/or campaign requirements, the following are some of the workflows we setup:
WEBPAGES AND LANDING PAGE
WEB FORMS/SURVEYS
OPT-IN SEQUENCES
EMAIL AND/OR NURTURE SEQUENCES TO MOVE LEADS THROUGH BUYER'S JOURNEY
APPOINTMENT SCHEDULING /BOOKING FUNNELS
1. TEAM MANAGEMENT: Adding Staff
Follow this step to grant employee access to your CRM. Any employee added will show up in the ''Team Management'' tab.
To access Team Management follow the following steps:
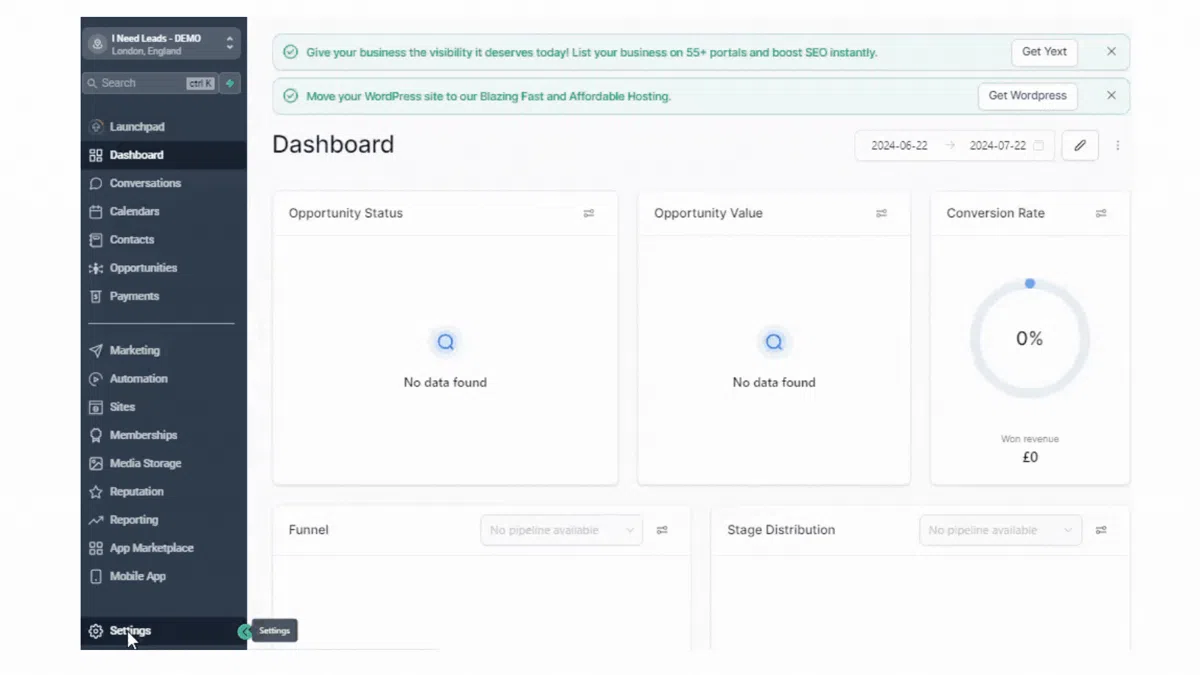
1. Click "Settings" in the side navigation menu of the sub-account view
2. Click "My Staff"
Here you or the client can add, delete, or edit details of a user
Adding or editing an user allows you to update:
1. Personal logo
2. First name and Last Name
3. Email (login email)
4. User's Phone Number
5. Password (login password)
6. User Roles (as show below)
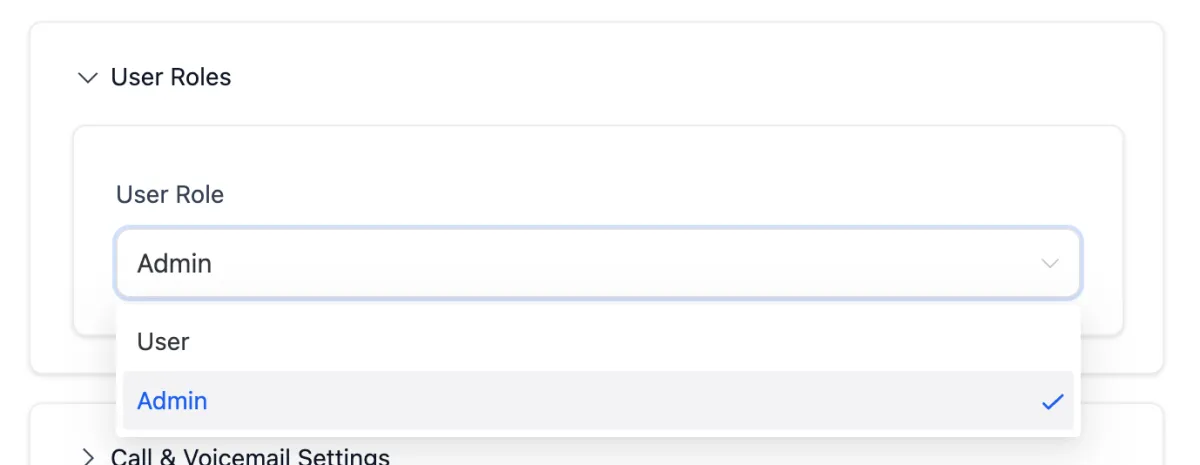
You (admin) can change the role of a particular user by going to Settings > My Staff > Edit (pencil icon) > Scroll to and expand "User Roles"
2. ADDING A CARD on your CRM WALLET
What is the CRM WALLET FOR?
To charge for Twilio and Email rebilling, the system uses your CRM wallet. You need to recharge your wallet by ADDING A CARD. Each time a message/ email is sent, call is made, or a phone number is purchased, the wallet credits are debited.
Where is your CRM Wallet Accessed From?
The wallet can be accessed by going to Settings > Company Billing
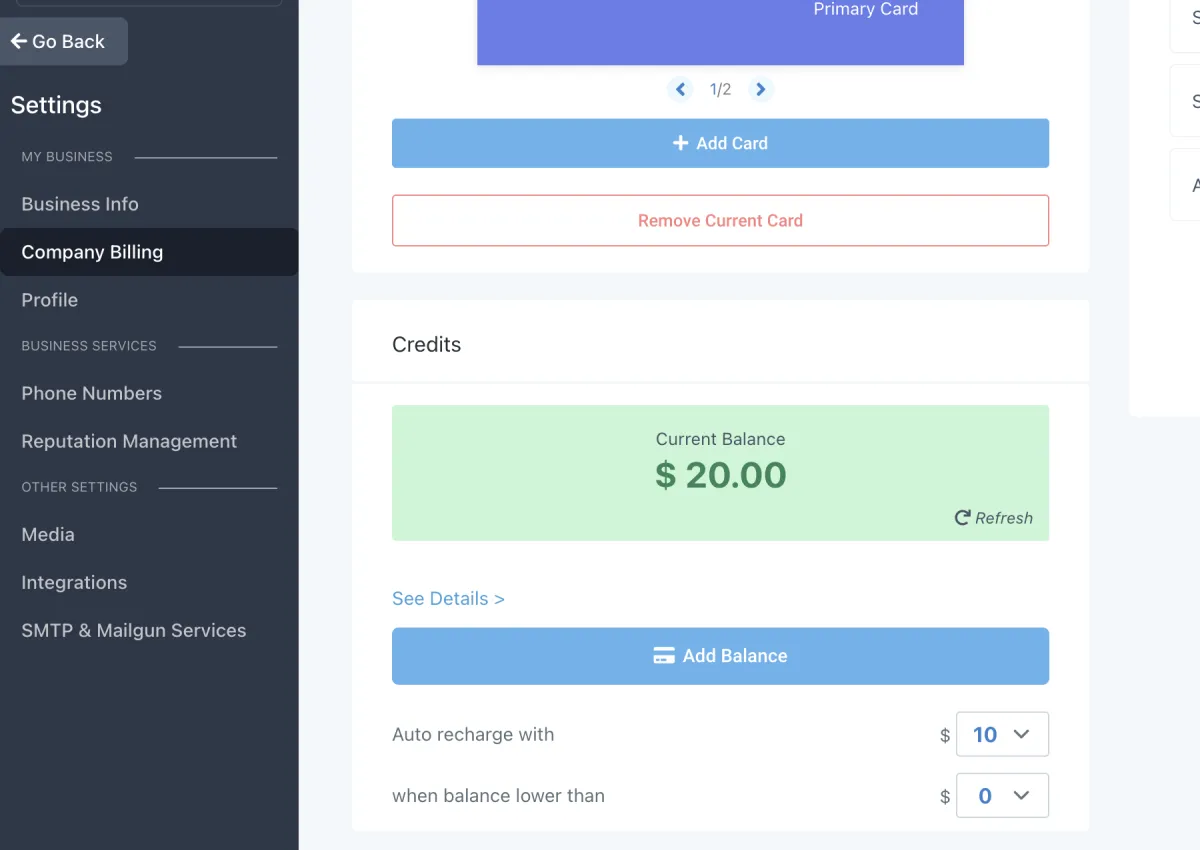
To add a card: Go to Settings > Company Billing > Add Payment Method
3. Purchasing a Phone Number
Why do you need to purchase a number for your CRM?
Within your CRM, you will see an option to purchase phone numbers and will come across TWILIO phone numbers.
Twilio Numbers: These are phone numbers you purchase directly within the CRM. Twilio numbers are essential for making and receiving calls and sending and receiving SMS (text) messages within the CRM system.
How to purchase a phone number within your CRM:
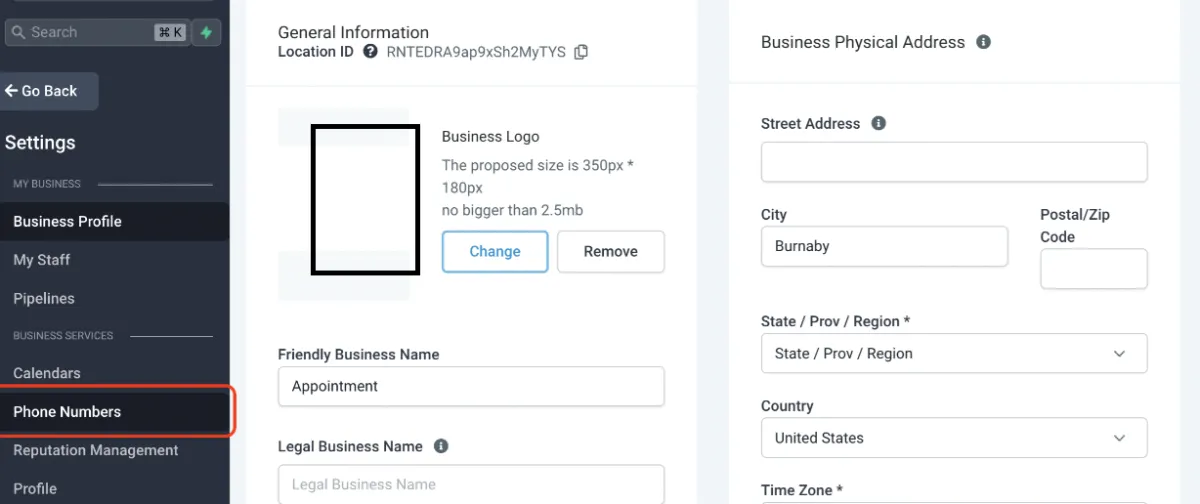
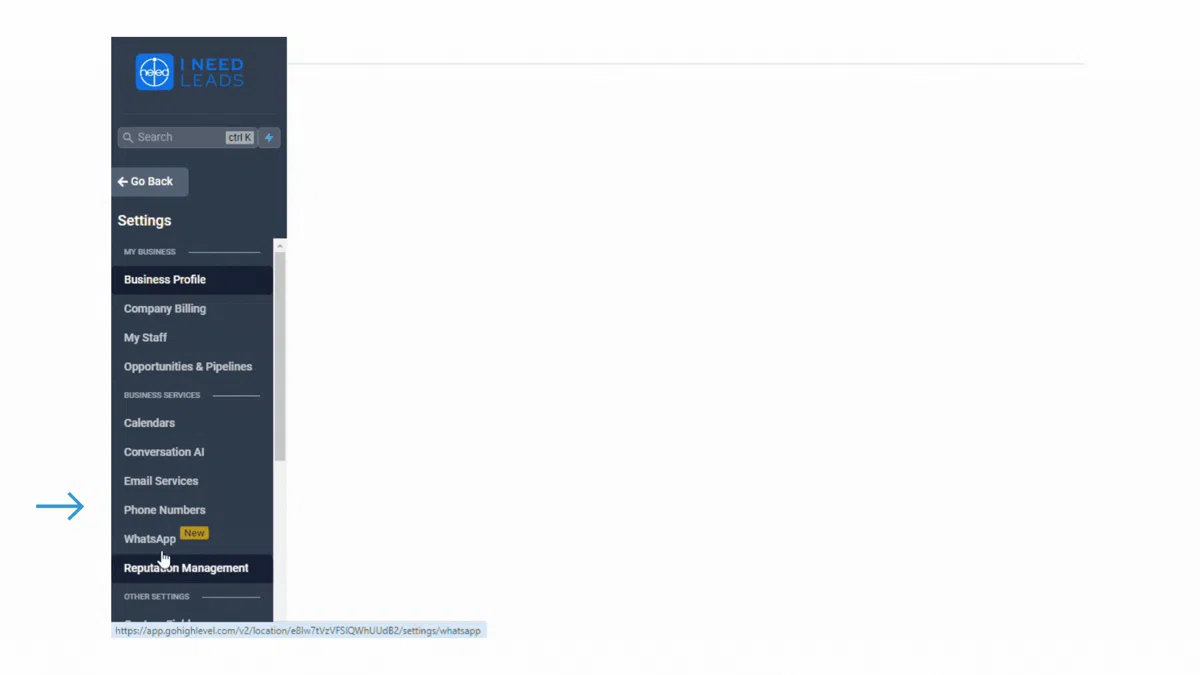
Go to >Settings
Go to >Settings>Phone Numbers
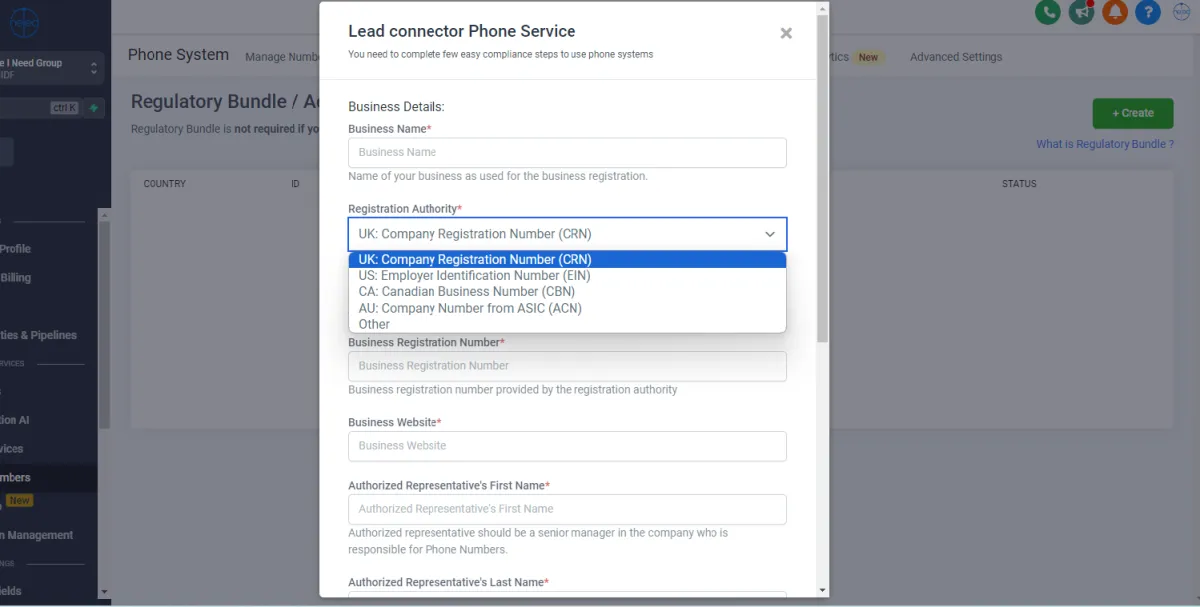
You can now PURCHASE A TWILIO NUMBER - "Please Select Bundle/Address'' to Purchase Number
For Dual Functionality (Voice and SMS enabled) Phone Numbers, please choose Mobile for the type of Phone.
Fill in your company information on the ''Lead connector Phone Service'' form.
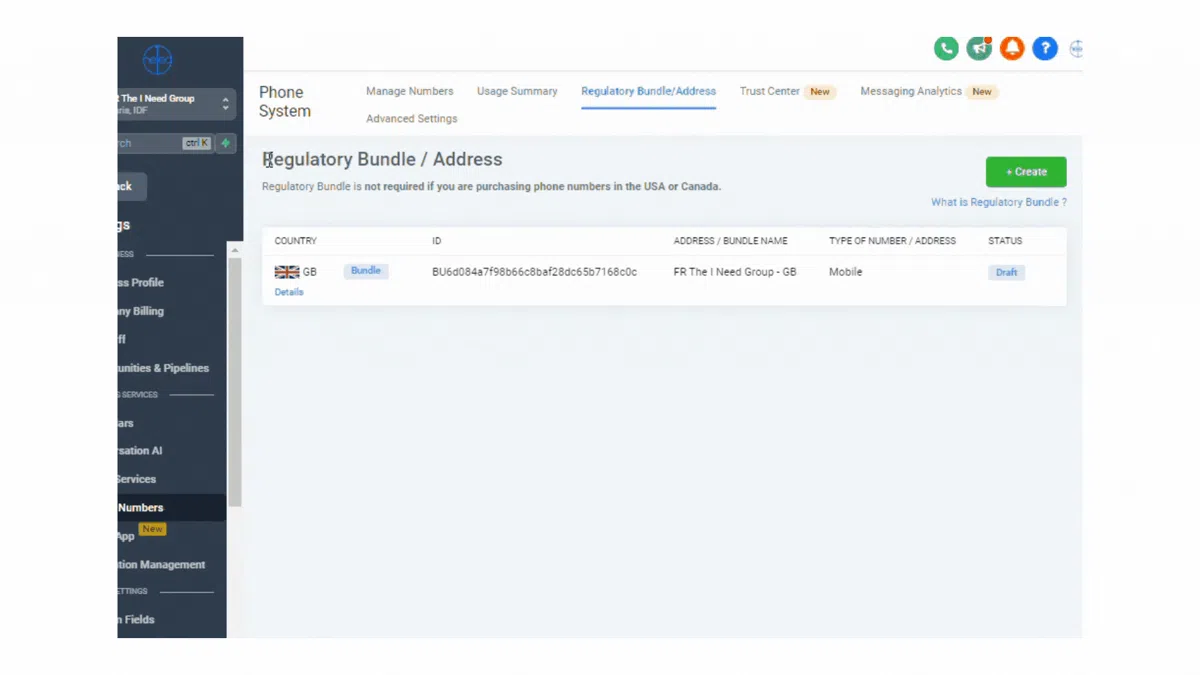
Once your Regulatory Bundle / Address is set-up, go to Manage Numbers to purchase a phone number within the system.
Step 6
BUILD YOUR OWN BOT
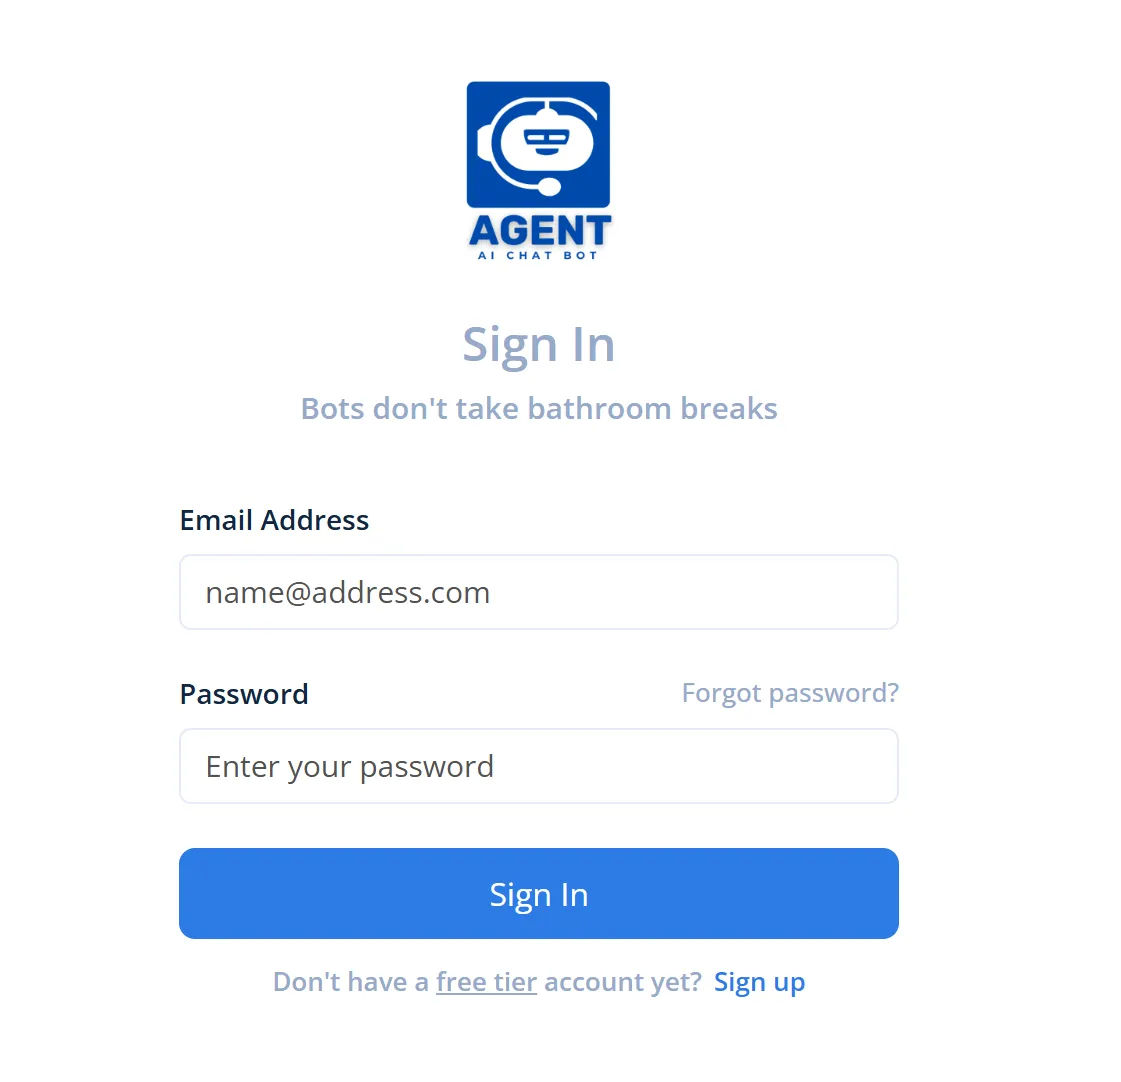
AGENT AI Chat Bot Access
Create a new account:
Sign up with your email address and nominated secure password
Login to AGENT AI Chat Bot and explore how you can create your own bot. Our dedicated team will be guiding you on how to create and maximise the function of your bot/bots.
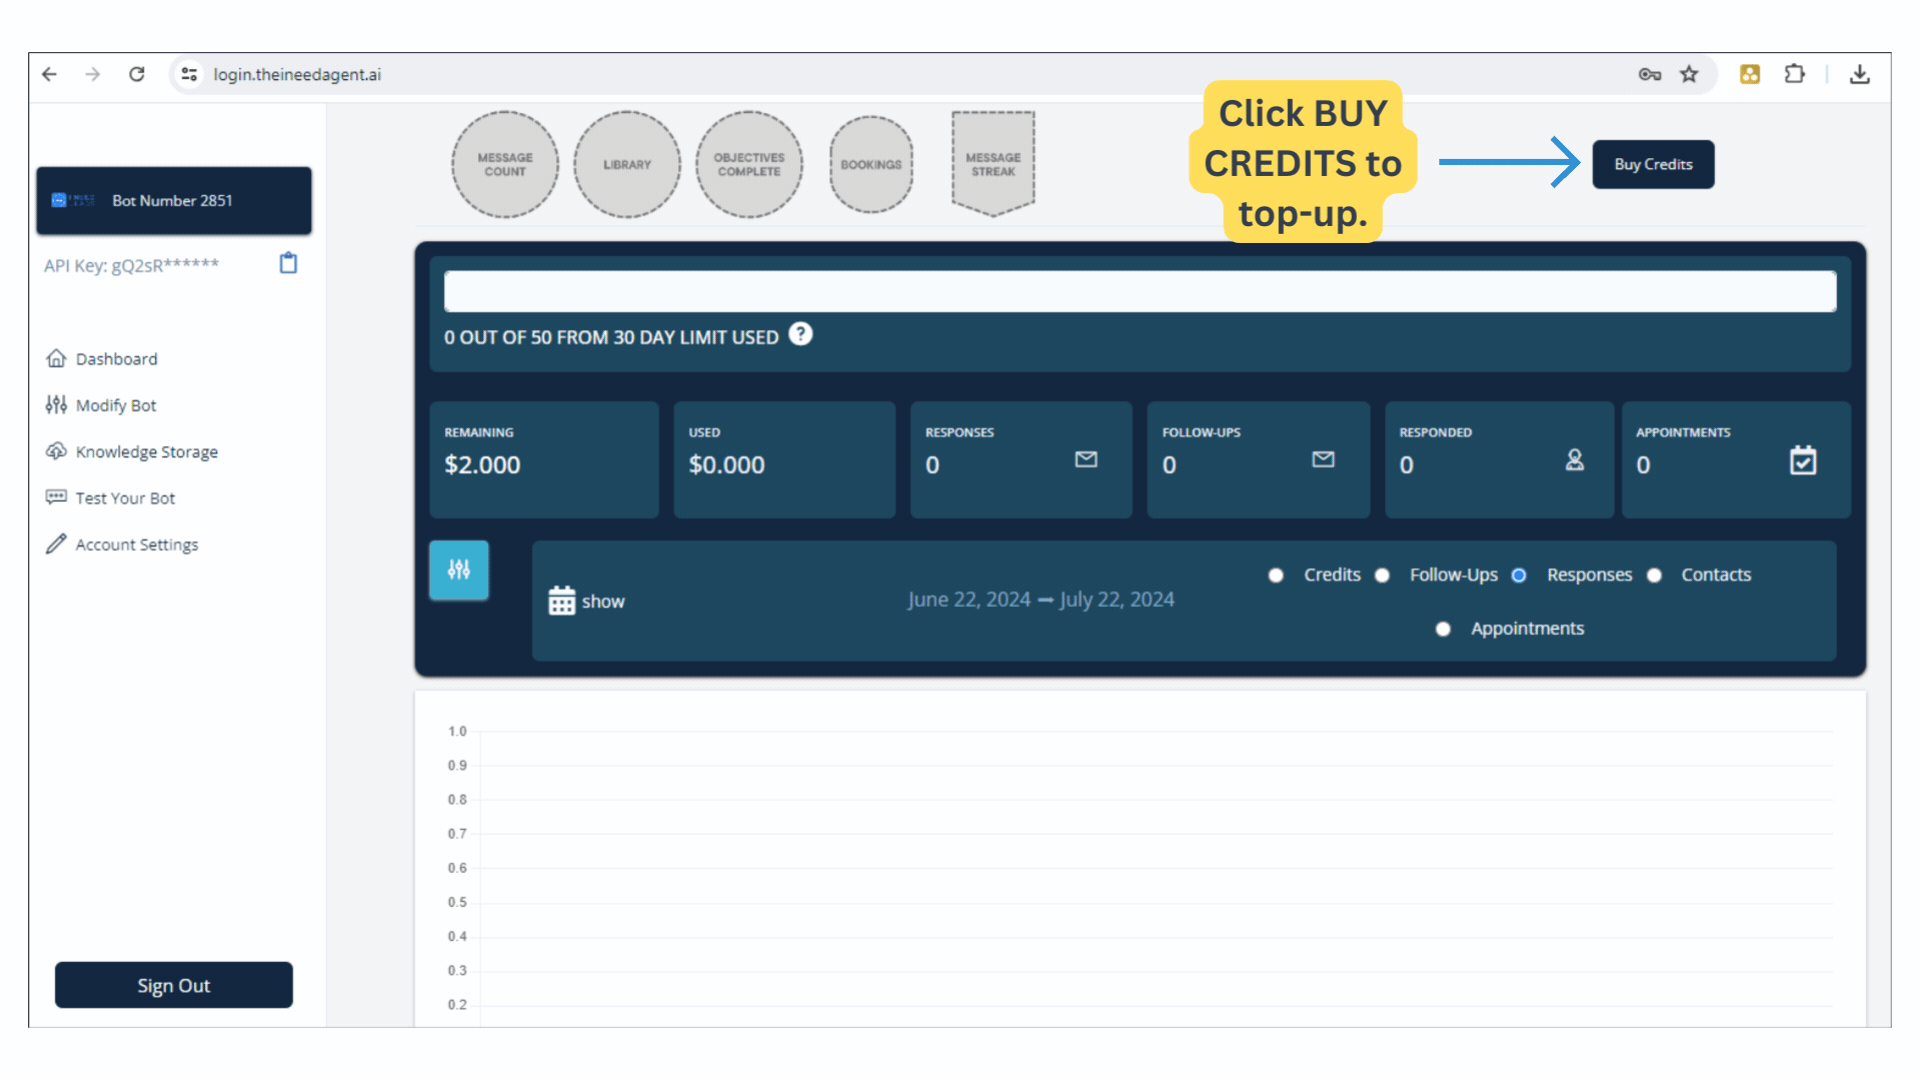
Buy Credits (minimum top-up of $20) to activate and test your bot. Enjoy!
Step 7
BUILD YOUR OWN BOT
AGENT AI Chat Bot Access
Create a new account:
Sign up with your email address and nominated secure password
Login to AGENT AI Chat Bot and explore how you can create your own bot. Our dedicated team will be guiding you on how to create and maximise the function of your bot/bots.
Buy Credits (minimum top-up of $20) to activate and test your bot. Enjoy!
Need More Information About Our Suite of Services and How We Can Tailor Them To Fit Your Unique Business Needs?
UNLIMITED PLAN
PRO PLAN
CUSTOMISED PLAN
AI CHAT BOT DEVELOPMENT
ALL-IN-ONE CRM
SEO
WEBSITES & LANDING PAGES
GRAPHIC DESIGN
VIDEO MARKETING
Need More Information About Our Suite of Services and How We Can Tailor Them To Fit Your Unique Business Needs?
UNLIMITED PLAN
PRO PLAN
CUSTOMISED PLAN
AI CHAT BOT DEVELOPMENT
ALL-IN-ONE CRM
SEO
WEBSITES & LANDING PAGES
GRAPHIC DESIGN
VIDEO MARKETING
Some of the Businesses We Work With


NAVIGATION
SOLUTIONS
RESOURCES
LEGAL
COMPANY
GET IN TOUCH
128 City Road, London, EC1V 2NX
Company number: 14241556

© Copyright 2023. THE I NEED GROUP.
All Rights Reserved.
NAVIGATION
SOLUTIONS
RESOURCES
LEGAL
COMPANY
GET IN TOUCH
Company number: 14241556
128 City Road, London, EC1V 2NX
© Copyright 2023. THE I NEED GROUP. All Rights Reserved.